Introduction
The NO FLUSH urinal system uses bacterial/enzyme action (bacteria contained within the BioSleeve unit) in conjunction with a water management system (solenoid & timer) to
effectively reduce water consumption, eliminate smells & reduce blockages in urinals. The system is ‘No Flush’ in so far as the urinal user does not flush the urinal. It otherwise
still flushes but according to the timing/solenoid mechanism. BioSleeve’s are disposable, replaced at approximately 3 month intervals. The complete system is hygienic, low
maintenance & cost saving.
1. Installation needs: proper installation is important for NO FLUSH function.
Installation requirements
| For Plumbing |
BioSleeve unit Collar (different sizes available) Timer unit (AC or DC) Solenoid valve (AC or DC) Air gap Additional: self seal flexi hose, stop tap, ferro prey adhesive |
| For Customer |
BioClean Biocidal Concentrate Spray Bottle Wall plate Cleaning Procedure Manual |
2. Usage
To establish a typical use pattern, the green gel within the BioSleeve should be monitored periodically. The average life is 3-4 months depending on traffic/water volumes etc. To
change, simply remove BioSleeve from collar (by twist motion) & replace with new unit. If an extension is fitted, be sure to include this on the replacement BioSleeve.
3a. Installation – BioSleeve & collar: Wall hung urinals.
NOTE:
Urinals must be DEEP CLEANED before proceeding with installation.
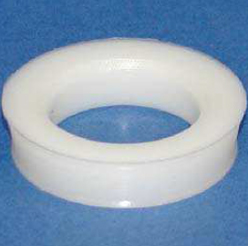
Fig 1: Plastic collar to fit into outlet. Trim edge if required
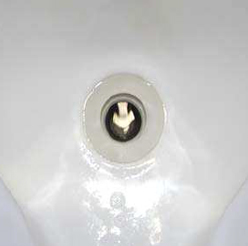
Fig 2: Fit plastic collar using ferro prey adhesive*.
IMPORTANT: FERROPREY adhesive/sealant is recommended. (Others may not adhere effectively or be resistant to urine)
NOTE:
Urinals must be DEEP CLEANED before proceeding with installation.
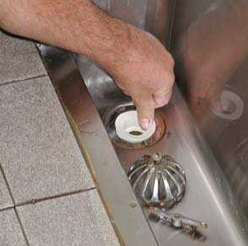
Fig 1: Fit plastic collar using using ferroprey adhesive*.
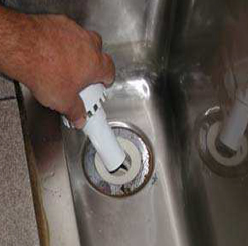
Fig 2: Fit BioSleeve firmly into Collar. DO NOT glue/seal. the BioSleeve in place.
Ensure smooth finish & seal around circumference of outlet (this is important for BioSleeve function).When possible fit collar deep enough to be able to refit the urinal outlet grate overtop the fitted BioSleeve (to maintain the original appearance of the urinal).
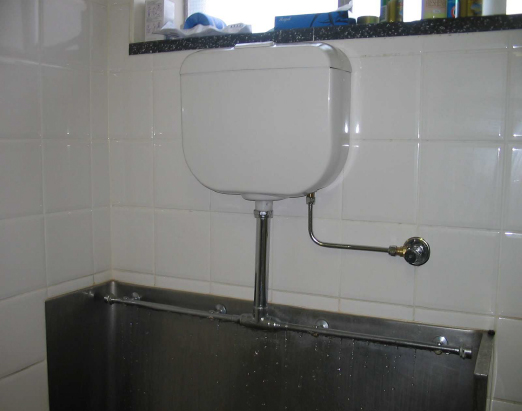
4a. Installation – DC Solenoid/Timer/Air gap: Internal Cistern where no ready power supply available to install AC units.
MATERIALS:
- approx. 300mm continuous thread tubing (cut to length)
- right angle bend
- 150mm copper tube ½ ”
- x1 nut & olive ½ ”
- ½ ” to 20 mm M&F adapter (to join physical air gap)
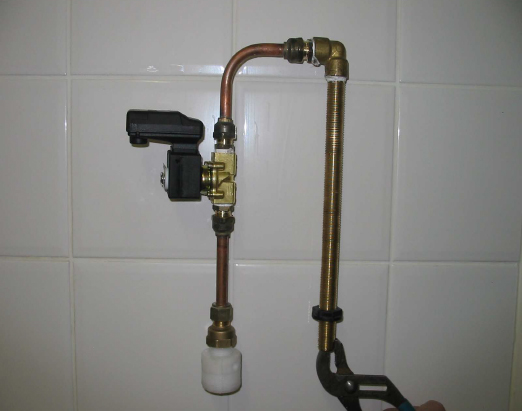
Fig 2: Retrofit of DC solenoid & timer.
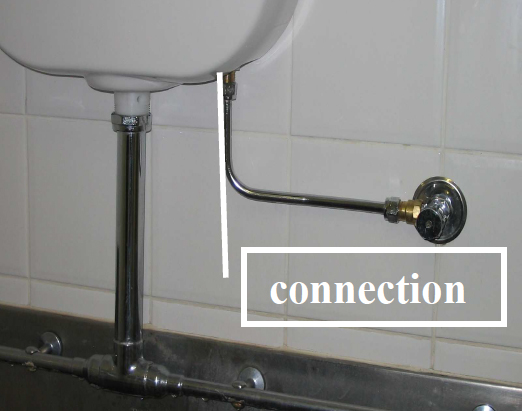
Fig 4: Connect ‘all thread’ tubing to inlet pipe.
Fig 3: Fit retrofit inside empty cistern.
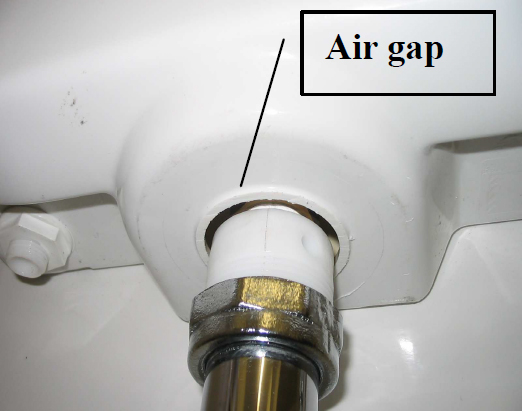
Fig 5: Align & connect physical air gap.
NOTE: ensure outflow pipe from solenoid descends directly over sparge outlet. This will maximize pressure into the spreader & prevent potential splashback onto the timer.
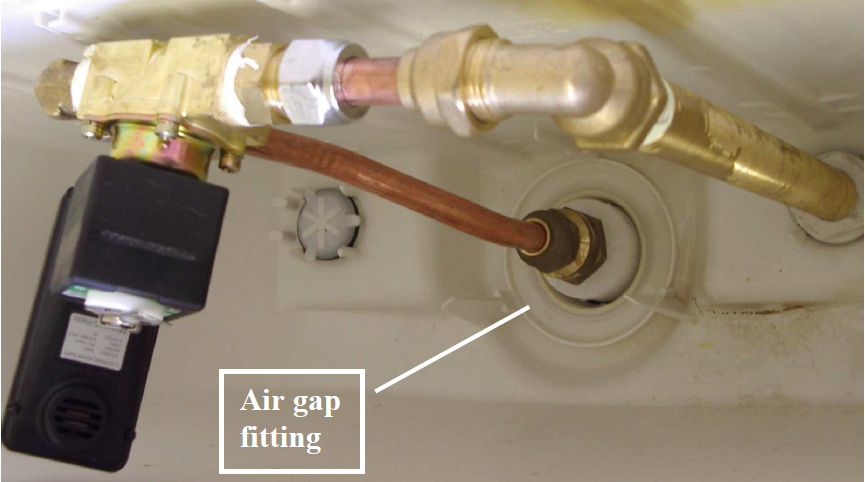
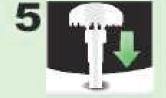
Fig 6: Fully installed DC Solenoid/timer & air gap.
Fig 7: Fitted BioSleeve collar, level & completely sealed around circumference.
NOTE:
- Fit solenoid/timer as high in the cistern as possible (whilst still allowing lid to be fitted). This will distance the unit from any possible splashing.
- Fit elbow directly above sparge so that piping descends directly into sparge outlet. This will reduce splashback onto the timer & optimise flow & therefore spread across the urinal slab.
- Fit the BioSleeve collar level & without any gaps around its edge (using correct selastic). It is IMPORTANT that any fluid flows thru the BioSleeve only & not though gaps to maintain the water trap.
- Once BioSleeve is fitted ensure cleaning staff are aware of new cleaning requirements (see Introduction booklet). ONLY special cleaning agents are suitable. Other agents will affect bacterial activity of the BioSleeve.
4b. Installation – AC Solenoid/Timer/Air gap: Power supply available either induct or external.
Fig 1: Urinal with spreader bar
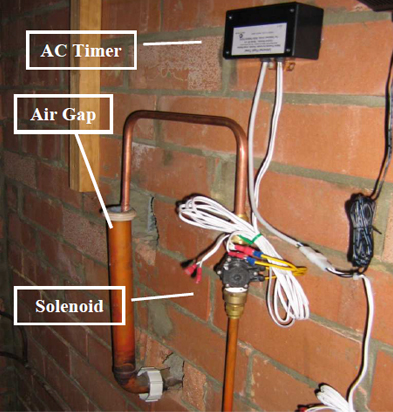
Fig 2: In duct installation.
4c. Installation – AC using housing box
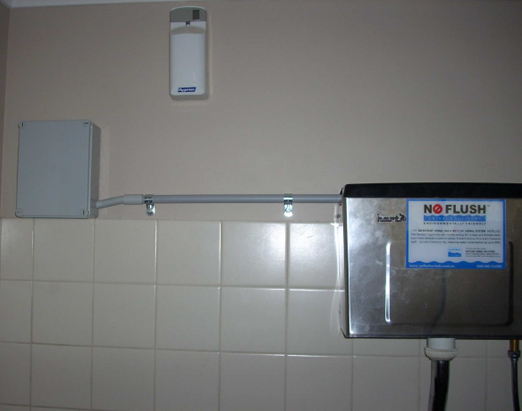
Fig 1: Example of No Flush installed into 2 external cisterns on wall with timer inside electrical Box.
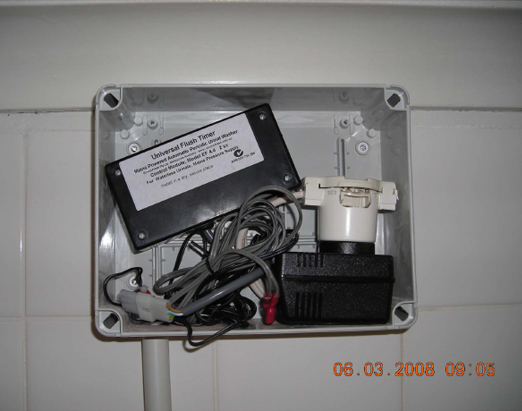
Fig 2: Example of power point and AC timer inside electrical box
5. REPLACING THE BIOSLEEVE
Bio sleeves are replaced once the green gel within it is wasted, generally after 3 months (up to 6 months) use depending on the Urinal location/usage/timer settings.

Gently twist old BIO-SLEEVE upwards to remove from collar.

If a sleeve or extension is fitted to the BIO-SLEEVE, this must be removed and then refitted to the new BIO-SLEEVE.

The sleeve ensures a secure fit and seal of the whole BIO-SLEEVE unit.

The extension (when fitted) ensures the BIO-SLEEVE reaches the water level in the urinal trap.
Gently push new BIO-SLEEVE into collar. Be sure unit is inserted fully and sits secure.